Get Resource ID by Resources String Name Android example
// image from res/drawable
	int resID = getResources().getIdentifier("my_image",
			"drawable", getPackageName());
// view
	int resID = getResources().getIdentifier("my_resource",
			"id", getPackageName());

// string
	int resID = getResources().getIdentifier("my_string",
			"string", getPackageName());
396LW NO topic_id
AD
Další témata ....(Topics)
Canvas, drawCircle(), Paint, onDraw(), setStrokeWidth(), setStyle()
public class MainActivity extends Activity {
	@Override
	protected void onCreate(Bundle savedInstanceState) {
		super.onCreate(savedInstanceState);
		setContentView(new SampleView(this));
	}

	private static class SampleView extends View {

		// CONSTRUCTOR
		public SampleView(Context context) {
			super(context);
			setFocusable(true);

		}

		@Override
		protected void onDraw(Canvas canvas) {

			canvas.drawColor(Color.CYAN);
			Paint p = new Paint();
			// smooths
			p.setAntiAlias(true);
			p.setColor(Color.RED);
			p.setStyle(Paint.Style.STROKE);
			p.setStrokeWidth(4.5f);
			// opacity
			//p.setAlpha(0x80); //
			canvas.drawCircle(50, 50, 30, p);
		}

	}
}
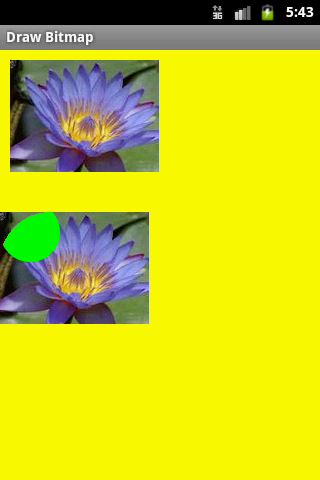
public class MainActivity extends Activity {

	@Override
	protected void onCreate(Bundle savedInstanceState) {
		super.onCreate(savedInstanceState);
		setContentView(new SampleView(this));
	}

	private static class SampleView extends View {

		// CONSTRUCTOR
		public SampleView(Context context) {
			super(context);
			setFocusable(true);

		}

		@Override
		protected void onDraw(Canvas canvas) {
			Paint paint = new Paint();

			canvas.drawColor(Color.YELLOW);

			 Bitmap b = Bitmap.createBitmap(200, 200,
			 Bitmap.Config.ARGB_8888);

			// you need to insert a image flower_blue into res/drawable folder

			paint.setFilterBitmap(true);
			Bitmap bitmapOrg = BitmapFactory.decodeResource(getResources(),
					R.drawable.flower_blue);
			canvas.drawBitmap(bitmapOrg, 10, 10, paint);
			int width, height;

		    Canvas c = new Canvas(b);
		    paint.setAlpha(255); //0x80
		    c.translate(0, 30);
		    c.drawBitmap(bitmapOrg, new Matrix(), paint);
		    paint.setColor(Color.BLUE);
        Path mPath = new Path();
		    mPath.addCircle(50, 50, 50, Path.Direction.CCW);
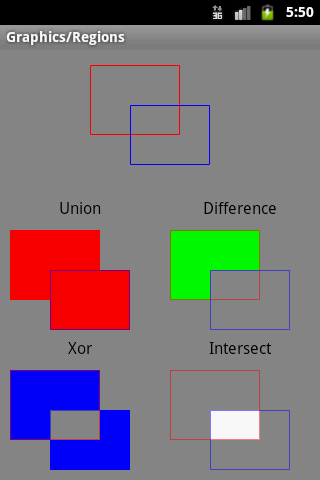
            //c.clipPath(mPath, Region.Op.UNION);
            //c.clipPath(mPath, Region.Op.DIFFERENCE);
            c.clipPath(mPath, Region.Op.INTERSECT);
            //c.clipPath(mPath, Region.Op.REPLACE);
            //c.clipPath(mPath, Region.Op.XOR);
           paint.setColor(Color.GREEN);
           paint.setAntiAlias(true);
           c.drawCircle(30, 20, 30, paint);

		    int h = bitmapOrg.getHeight();
			//canvas.drawBitmap(bitmapOrg, 10, 10, paint);
			canvas.drawBitmap(b, 0, 10 + h + 10, paint);

		}

	}
}


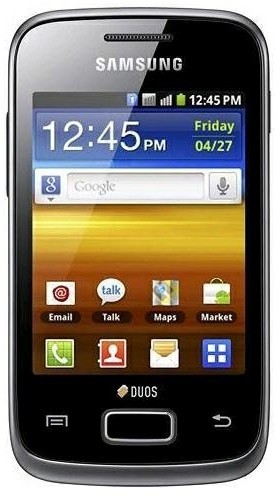
| Brand | Samsung |
| Model (codename) | Galaxy Y (S5360) |
| Cena, včetně DPH | 2400 / 06.2012 |
| Display size (v palcích) | 3 |
| Display-resolution | 240x320 |
| Dotek-typ | kapacitní |
| CPU typ | BCM21553 |
| CPU MHz | 832 |
| CPU core | |
| L2 cache | ? |
| RAM | 256 |
| ROM | 512 |
| GPU | VideoCore IV |
| NenaMark2 Benchmark | 12 |
| GPU-GLBenchmark | |
| Baterie mAh | 1200 |
| Foto MPx | 2 |
| Autofocus | ne |
| Video | |
| Official Android ICS | Android OS v 2.3 |
| CyanogenMod support | |
| Dotek-prstů-max | |
| Display-ppi | 133 |
| Display-retina | 41% |
| Network | čîtyřpásmový GSM 850/900/1800/1900 MHz , HSDPA 2100 MHz |
| Connectivity | Bluetooth v2.0 plus EDR plus support A2DP, USB host |
| Pozn. | CPU ARMv6, GPU 20MT/s OpenGL ES 2.0 |

Android development
long is 64 bit signed type and used when int is not large enough to hold the value.
long je celé číslo 64 bitů -9223372036854775808 +9223372036854775807 a používá se tam, kde typ int není schopen pojmout takovou hodnotu čísla.
long is 64 bit signed type and used when int is not large enough to hold the value.
long je celé číslo 64 bitů -9223372036854775808 +9223372036854775807 a používá se tam, kde typ int není schopen pojmout takovou hodnotu čísla.
		// declaration and assignment of value type long
		long n = 22337203685477580L;
		// print formated value
		System.out.printf("The value of x is %d%n", n); // 22337203685477580
		System.out.format("%+,8d%n%n", n); // +22 337 203 685 477 580

		// declaring more variables in single statement
		long lo1 = 12L, lo2 = 56, lo3 = 1455555555589L;

		// long range of value
		System.out.println(Long.MAX_VALUE); // 9223372036854775807
		System.out.println(Long.MIN_VALUE); // -9223372036854775808

		// check if a string is a valid number in Java example
		// convert string to long Java example
		String sLong = "1288888888888888";
		long longParse = Long.parseLong(sLong);

		// convert strings to numbers
		long longFromString = (Long.valueOf(sLong)).longValue();

		// long to string in Java example code
		Long longObj = new Long(229999999999L);
		String str = longObj.toString();
		// else
		Long longS = 888888888888L;
		String strLong = longS.toString();

		// compare two long variables
		Long longComp1 = 5555L;
		if (longComp1.equals(55555555L))
			System.out.print("true");

		// compares the two specified long values in Java example

		int i = longS.compareTo(444444L); // -1 first < second
		// 0 first == second
		// 1 first > second
		System.out.print(i);
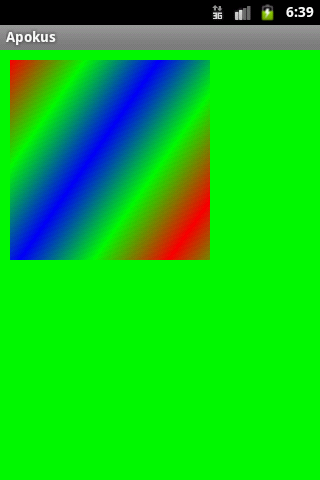
public class ApokusActivity extends Activity {

	@Override
	protected void onCreate(Bundle savedInstanceState) {
		super.onCreate(savedInstanceState);
		setContentView(new SampleView(this));
	}

	private static class SampleView extends View {

		// CONSTRUCTOR
		public SampleView(Context context) {
			super(context);
			setFocusable(true);

		}
		@Override
		protected void onDraw(Canvas canvas) {
			Paint paint = new Paint();

			canvas.drawColor(Color.GREEN);

            Bitmap b = Bitmap.createBitmap(200, 200, Bitmap.Config.ALPHA_8);
             paint.setColor(Color.BLUE);

            Shader mShader = new LinearGradient(0, 0, 100, 70, new int[] {
                    Color.RED, Color.GREEN, Color.BLUE },
                    null, Shader.TileMode.MIRROR);  // CLAMP MIRROR REPEAT
            Canvas c = new Canvas(b);
            paint.setShader(mShader);
            //c.drawCircle(60, 60, 30, paint);
            c.drawRect(0, 0, 200, 200, paint);
            canvas.drawBitmap(b, 10,10, paint);
		}

	}
}

Editace: 2011-11-19 13:07:25
Počet článků v kategorii: 396
Url:get-resource-id-by-resources-string-name-android-example


