Draw drawARGB() Android basic example
public class MainActivity extends Activity {
	@Override
	protected void onCreate(Bundle savedInstanceState) {
		super.onCreate(savedInstanceState);
		setContentView(new SampleView(this));
	}

	private static class SampleView extends View {

		// CONSTRUCTOR
		public SampleView(Context context) {
			super(context);
			setFocusable(true);

		}
		@Override
		protected void onDraw(Canvas canvas) {
			//drawARGB (int a, int r, int g, int b)
//			a  alpha component (0..255) of the color to draw onto the canvas
//			r  red component (0..255)
//			g  green component (0..255)
//			b  blue component (0..255)

			canvas.drawARGB(255, 0, 255, 10);
		}

	}
}
396LW NO topic_id
AD
Další témata ....(Topics)
How add item to ArrayList, sort ArrayList, search find index of item in ArrayList, min(), max() Java basic example.
import java.util.ArrayList;
import java.util.Collections;

public class MainClass {
	public static void main(String[] arg) {
		String[] arrayOfString = {"nothing", "Hello", "people"
				, "bye-bye", "hello", "world!", "End" };
		   ArrayList<String> arrayList = new ArrayList<String>();
            for(String s: arrayOfString)
		     arrayList.add(s);

		    Collections.sort(arrayList);
		    // foreach
		    for (String str: arrayList)
		      System.out.println(str);

		    Object objMin = Collections.min(arrayList);
		    System.out.println("Min is: " + objMin);

		    Object objMax = Collections.max(arrayList);
		    System.out.println("Max is: " + objMax);

		    int index = Collections.binarySearch(arrayList, "people");
		    System.out.println("Index of people is: " + index);

		  }


}
/*
End
Hello
bye-bye
hello
nothing
people
world!
Min is: End
Max is: world!
Index of people is: 5
*/
// in strings.xml
<string name="myStringWithTags"><![CDATA[<b>some text..</b> other tags ...]]></string>
<string name="myStringWithPattern"><![CDATA[<b>%s</b> other tags ...]]></string>
// in Activity.class
String sHtmlText = this.getApplicationContext().getString(R.string.myStringTags);
         sHtmlText = this.getApplicationContext().getString(R.string.myStringWithPattern,"replace %s with this text");
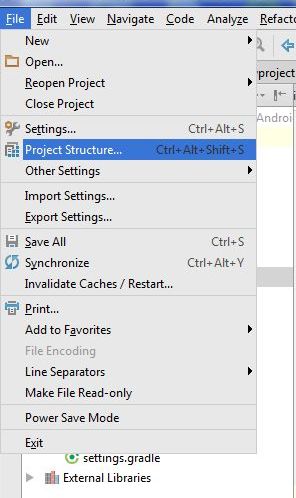
Hide module - open dialog: File > Project Structure Ctrl + Alt + Shift + S

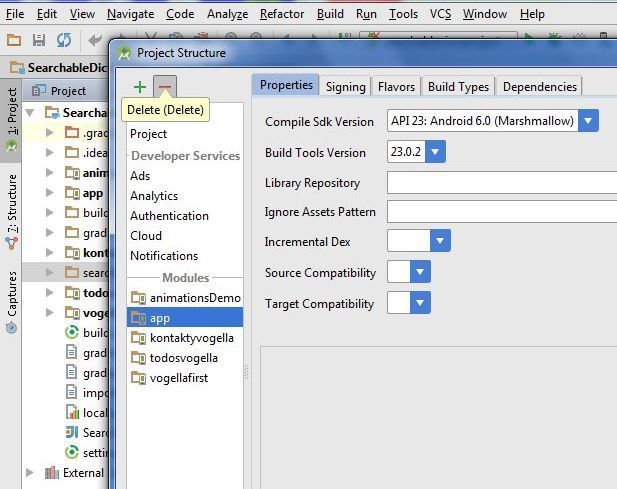
Hide module: in opened Dialog select module which will hidden and click on minus (left upper corner)

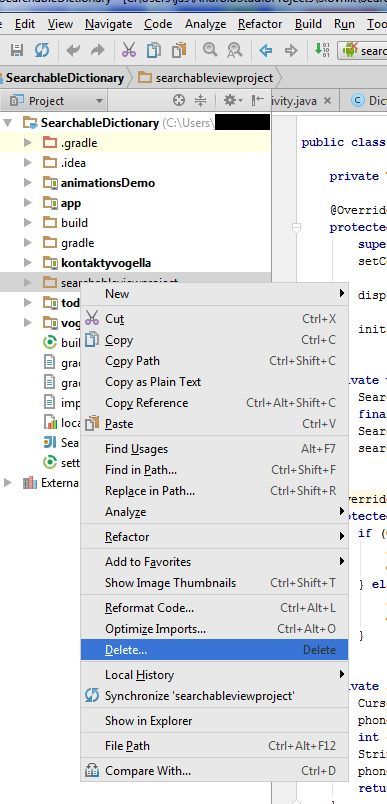
If module is hidden, you can permanetly delete module from disk. But if you want using module in future, copy module into other folder (not into AndroidProjects folder and his subbfolders) and delete module permanetly from project and disc. Right mouse click on module and select from menu Delete.

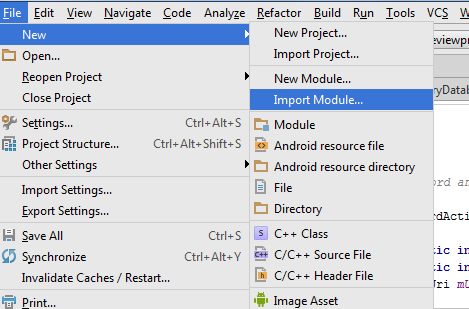
If you want import the backup copy to project, use: File>New>Import mudule


Hide module: in opened Dialog select module which will hidden and click on minus (left upper corner)

If module is hidden, you can permanetly delete module from disk. But if you want using module in future, copy module into other folder (not into AndroidProjects folder and his subbfolders) and delete module permanetly from project and disc. Right mouse click on module and select from menu Delete.

If you want import the backup copy to project, use: File>New>Import mudule

Download image file from URL to ImageView Java Android source example code.
Context context = thisClass.this;
Drawable image = ImageOperations(context,
"//www.okhelp.cz/images/android/ad_4.png"
,"image.jpg");
ImageView imgView;
imgView = (ImageView)findViewById(R.id.idImageView);
imgView.setImageDrawable(image);

	private Drawable ImageOperations(Context ctx, String url, String saveFilename) {
		try {
			InputStream is = (InputStream) this.fetch(url);
			Drawable d = Drawable.createFromStream(is, "src");
			return d;
		} catch (MalformedURLException e) {
			e.printStackTrace();
			return null;
		} catch (IOException e) {
			e.printStackTrace();
			return null;
		}
	}

	public Object fetch(String address) throws MalformedURLException,IOException {
		URL url = new URL(address);
		Object content = url.getContent();
		return content;
	}
If You create new xml file with prefix _ , for example _style.xml and You to clean project (Project->Clean), than package in folder project\gen will deleted with R.java class and new R.java not be created.
For to solving this problem You have to rename file without prefix _ as style.xml or name what You need and rebuild project.
If some ID cannot be resolved or is not a field get error occurence
You have to delete import android.R; in Activity.class if was inserted,
when this error is displayed.
For to solving this problem You have to rename file without prefix _ as style.xml or name what You need and rebuild project.
If some ID cannot be resolved or is not a field get error occurence
You have to delete import android.R; in Activity.class if was inserted,
when this error is displayed.
Editace: 2013-12-09 13:10:51
Počet článků v kategorii: 396
Url:draw-drawargb-android-basic-example


