Conversion to Dalvik format failed with error 1
UNEXPECTED TOP-LEVEL EXCEPTION:
java.lang.IllegalArgumentException: already added: Lcz/okhelp/MyMathClass;
First try this solution!!!!!
Select your project in project tree and go to the Eclipse menu Project » Clean » Clean projects selected below » select your project and click OK.
If you create *.apk package with proguard sometimes you must back up the project, delete project, and create new project if you are unable to create *.apk file.
Check your AndroidManifest.xml if all Activity is correctly inserted. If you add a library project to Main project you have to insert Activity from library to Main project AndroidManifest.xml
Problem with the library.
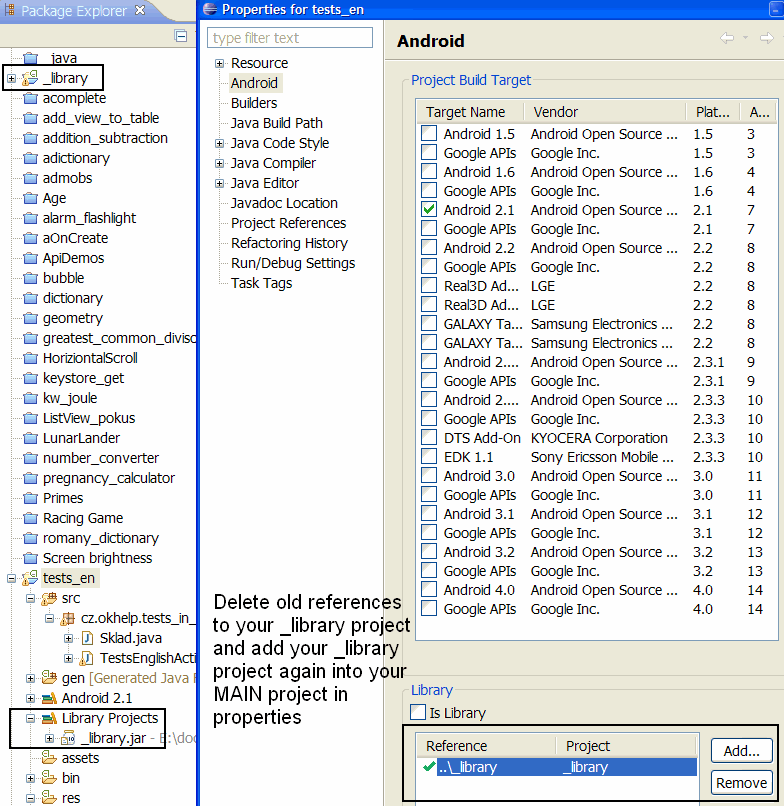
I deleted library project from project tree and again put the _library project into the main project. This problem was resolved.
1.)Go to Project » Properties » Java Build Path » Libraries and remove (your projects) click OK.
2.)Go to Project » Clean » Clean projects selected below » select your project and click OK.
3.)Add again your LIBRARY project to your MAIN project Project » Properties » Java Build Path » Libraries.
See image below.
Problem with a *.apk file
If you create signed *.apk, you have to delete previous *.apk from your PC folder.

396LW NO topic_id
AD
Další témata ....(Topics)
Log.e println needs a message error.
E/AndroidRuntime(330): FATAL EXCEPTION: main
java.lang.RuntimeException: Unable to start activity ComponentInfo{b.paint/b.paint.MainActivity}: java.lang.NullPointerException: println needs a message
Try this code:
E/AndroidRuntime(330): FATAL EXCEPTION: main
java.lang.RuntimeException: Unable to start activity ComponentInfo{b.paint/b.paint.MainActivity}: java.lang.NullPointerException: println needs a message
Try this code:
		// Error
                String s = null;
		Log.e("bla", s); // !!! error Log.e println needs a message error.
                // OK
		String s = null;
		Log.e("bla", s+""); // OK
main.xml
    <LinearLayout xmlns:android="//schemas.android.com/apk/res/android"
		android:orientation="vertical"
			android:gravity="top"
        android:layout_width="fill_parent"
        android:layout_height="fill_parent" >

        <ScrollView
            android:id="@+id/scrollView1"
            android:layout_width="fill_parent"
            android:layout_height="wrap_content" >

            <HorizontalScrollView
                android:id="@+id/horizontalScrollView1"
                android:layout_width="match_parent"
                android:layout_height="wrap_content" >


            <LinearLayout
			    android:gravity="top"
                android:layout_width="fill_parent"
                android:layout_height="wrap_content" >

                <ImageView
                    android:id="@+id/imageViewObrazekGeometrie"
                    android:layout_width="360dp"
                    android:layout_height="777dp"
                    android:src="@drawable/geometrie_vzorecky" />

            </LinearLayout>
            </HorizontalScrollView>
        </ScrollView>

    </LinearLayout>
The Labeled continue statement as goto Java example.
public class MainClass {
	public static void main(String[] arg) {
		String[] arrayOfString = { "Hello", "people", "hello", "world!" };
		OuterLoop: for (int e = 0; e < 4; e++) {
			for (int i = 0; i < arrayOfString.length; i++) {
				if (arrayOfString[i].equals("hello"))
					continue OuterLoop;
				System.out.println(arrayOfString[i]);
			}
		}
	}
}
/*
Hello
people
Hello
people
Hello
people
Hello
people
*/
Update TextView from TimerTask, Handler, schedule, run, cancel TimerTask, Android example
public class TimerActivity extends Activity {
	TimerTask mTimerTask;
	final Handler handler = new Handler();
	Timer t = new Timer();
TextView hTextView;
TableRow hTableRow;
Button hButton, hButtonStop;


private int nCounter = 0;
@Override
    public void onCreate(Bundle savedInstanceState) {
        super.onCreate(savedInstanceState);
        setContentView(R.layout.main);
        hTextView = (TextView)findViewById(R.id.idTextView);
        hButton = (Button)findViewById(R.id.idButton);
        hButton.setOnClickListener(mButtonStartListener);
        hButtonStop = (Button)findViewById(R.id.idButtonStop);
        hButtonStop.setOnClickListener(mButtonStopListener);


    } // end onCreate

View.OnClickListener mButtonStartListener = new OnClickListener() {
	public void onClick(View v) {
		doTimerTask();
    }
};


	View.OnClickListener mButtonStopListener = new OnClickListener() {
    	public void onClick(View v) {
    		stopTask();

    	}
    };


    public void doTimerTask(){

    	mTimerTask = new TimerTask() {
    	        public void run() {
    	                handler.post(new Runnable() {
    	                        public void run() {
    	                        	nCounter++;
                                        // update TextView
    	                        	hTextView.setText("Timer: " + nCounter);

    	                        	Log.d("TIMER", "TimerTask run");
    	                        }
    	               });
    	        }};

            // public void schedule (TimerTask task, long delay, long period)
    	    t.schedule(mTimerTask, 500, 3000);  //

    	 }

    	  public void stopTask(){

    	   if(mTimerTask!=null){
    	      hTextView.setText("Timer canceled: " + nCounter);

    	      Log.d("TIMER", "timer canceled");
    	      mTimerTask.cancel();
    	 }

    }
}
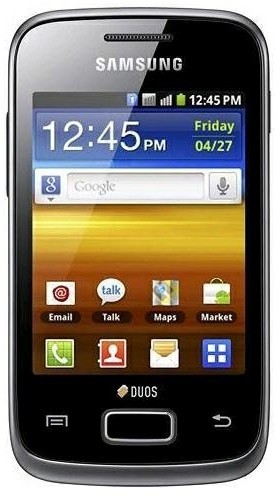
Samsung S6102 Galaxy Y Duos umožňuje pracovat se dvěma aktivními SIM kartami a má GPS navigaci. Cena cca 4.500 korun / léto 2012.
Displej
Rozlišení displeje 320 x 240
Velikost displeje 3.14 "
Počet barev 262000
Rozměry 104 mm x 60 mm x 11.5 mm
Fotoaparát 3 Mpix, natačení videosekvencí
Operační system Android 2.3 (Gingerbread)
Procesor 832 MHz
Funkce Dual sim, Změny velikosti písma, Java, Internetový prohlížeč Přehrávání MP3, jack 3,5, Psaní SMS a e-mailů Multimediální zprávy MMS, Dlouhé SMS, Emailový prohlížeč, Kontakty a volání Hlasité handsfree, MP3/WMA/AAC vyzvánění, Skupiny volajících, Baterie
Typ baterie Li-Ion 1300 mAh
Doba hovoru 370 min
Pohotovostní doba 440 hodin
Uživatelská paměť 160 MB
Datové funkce GPS modul, WiFi, Bluetooth, GPRS, EDGE, Hardwarový modem
Aplikace Diktafon, Kalendář, FM rádio, Záznamník hovoru, Hry v telefonu, Kalkulačka, Budík
Mobilní telefony Samsung mají velmi dobrý poměr KVALITA / CENA

Editace: 2013-12-09 10:36:59
Počet článků v kategorii: 396
Url:conversion-to-dalvik-format-failed-with-error-1


